How to Setup the Microsoft Dynamics 365 Integrator: Difference between revisions
No edit summary |
No edit summary |
||
| Line 15: | Line 15: | ||
# Add Domain to URL Section (This will launch a window to Accept/Approve the Connection between the Integration and Microsoft Dynamics) | # Add Domain to URL Section (This will launch a window to Accept/Approve the Connection between the Integration and Microsoft Dynamics) | ||
# Integration Successfully Linked | # Integration Successfully Linked | ||
#* Screen Prompt: <code>Integration Successfully Enabled, you can now close this window</code> | #* Screen Prompt/Confirmation Message: <code>Integration Successfully Enabled, you can now close this window</code> | ||
#* | #* Nova Integrator Status: Microsoft Dynamics 365 is now showing "Enabled" in the "Integrations" tab (button will change to blue). | ||
# Adding Users to the Integrator | # Adding Users to the Integrator | ||
## Hit the "Pencil" Icon to the Right of Microsoft Dynamics 365 in the Nova Portal. | ## Hit the "Pencil" Icon to the Right of Microsoft Dynamics 365 in the Nova Portal. | ||
Latest revision as of 10:46, 16 June 2026
Administrator Access Required:
To set up this integration, you will need administrator access to your Microsoft Dynamics 365 account and an Office Manager scope within the Nova Portal.
User Identity Matching:
Email Address Identification: The Microsoft Dynamics Integrator uses email addresses to identify the correct agents/users in Microsoft Dynamics 365.
No Email Present? If a Nova User doesn't have an email address, the Microsoft Dynamics 365 administrator can add the user's extension number in Microsoft Dynamics 365 to enable identification.
Setup Steps:
- Login to the Nova Portal
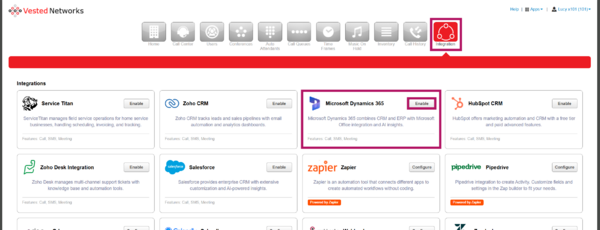
- Go to the "Integration" Tab and Select on the "Enable" Button on Microsoft Dynamics 365
- Add Domain to URL Section (This will launch a window to Accept/Approve the Connection between the Integration and Microsoft Dynamics)
- Integration Successfully Linked
- Screen Prompt/Confirmation Message:
Integration Successfully Enabled, you can now close this window - Nova Integrator Status: Microsoft Dynamics 365 is now showing "Enabled" in the "Integrations" tab (button will change to blue).
- Screen Prompt/Confirmation Message:
- Adding Users to the Integrator
- Hit the "Pencil" Icon to the Right of Microsoft Dynamics 365 in the Nova Portal.
- Enable Users for Calls, SMS, and Meetings Data
- In the "Advanced" is where the Tokens can be located (Please note: Any edits to this can affect the outcome of the task within Microsoft Dynamics 365)
- Contact:
[[phone_number]] - Employee:
[[employee]] - Call Direction:
[[call_direction]] - Call Time:
[[call_start]] - Call Event:
[[call_event]] - Recording:
[[recording_url]] [[transcription]]
- Contact:

If you have any questions about this process, or if you need assistance, please reach out to our Support Team by dialing HELP(4357) on your desk phone, calling (972) 924-6488, or submitting a ticket.