How to Setup the Salesforce CRM Integrator: Difference between revisions
Jump to navigation
Jump to search
No edit summary |
No edit summary |
||
| (One intermediate revision by the same user not shown) | |||
| Line 14: | Line 14: | ||
# Allow Access for the Connection | # Allow Access for the Connection | ||
# Integration Successfully Enabled | # Integration Successfully Enabled | ||
# | #* Screen Prompt/Confirmation Message: <code>Integration Successfully Enabled, you can now close this window</code> | ||
# | #* Nova Integrator Status: Salesforce is now showing "Enabled" in the "Integrations" tab (button will change to blue). | ||
# Adding Users to the Integrator and locating Tokens | # Adding Users to the Integrator and locating Tokens | ||
## From the Nova Portal under the "Integrations" tab, click the "Pencil" icon to the right of HubSpot. | ## From the Nova Portal under the "Integrations" tab, click the "Pencil" icon to the right of HubSpot. | ||
Latest revision as of 10:47, 16 June 2026
Please Note: To setup the Integrator, you need an admin account setup in Salesforce and an Office Manager scope within the Nova Portal.
User/Agent Identity: The Nova Portal uses email addresses through the integrator to Salesforce for identification.
If there's no email address on the Nova Agent/User, the Salesforce administrator can add the user's extension number in Salesforce to be identified by the integrator.
Go to Step 7 to see how to input the extension number in Salesforce.
Setup Steps:
- Login to the Nova Portal
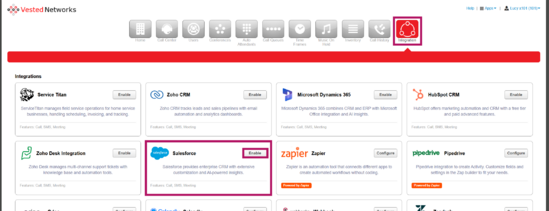
- Access the "Integration" Tab and Select the "Enable" Button within the Salesforce Box
- Log in to your Salesforce
- Allow Access for the Connection
- Integration Successfully Enabled
- Screen Prompt/Confirmation Message:
Integration Successfully Enabled, you can now close this window - Nova Integrator Status: Salesforce is now showing "Enabled" in the "Integrations" tab (button will change to blue).
- Screen Prompt/Confirmation Message:
- Adding Users to the Integrator and locating Tokens
- From the Nova Portal under the "Integrations" tab, click the "Pencil" icon to the right of HubSpot.
- Enable Users for Calls, SMS, and Meetings Data Logging
- In the "Advanced" is where the Tokens can be located (Please note: Any edits to this can affect the outcome of the task within Salesforce)
- Contact:
[[phone_number]] - Employee:
[[employee]] - Call Direction:
[[call_direction]] - Call Time:
[[call_start]] - Call Event:
[[call_event]] - Recording:
[[recording_url]] [[transcription]]
- Contact:
- Adding Extension Numbers in Salesforce (Please Note: The steps below are in Salesforce Lightning Experience This step is crucial for identification if the user in the Nova portal does not have an email address associated to it.)
- Go to Settings via the Gear Icon and then Setup (This will launch a new tab)
- Go to Users under the "Administration" column, go to "Users" within the dropdown and select "Edit" on the desired User
- Scroll Down to Extension and Add User's Extension Number

If you have any questions about this process, or if you need assistance, please reach out to our Support Team by dialing HELP(4357) on your desk phone, calling (972) 924-6488, or submitting a ticket.