How to Forward Calls To After Hours Early
Creating the Time Frame
First you will need to create a custom time frame that will be used to overwrite your normal business hours routing.
Navigate to the Time Frames tab, and click Add Timeframe.
Give your time frame a name
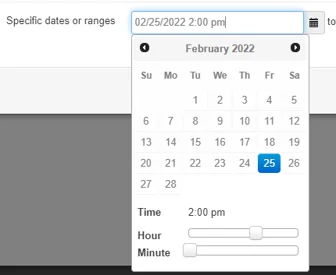
Choose the option for Specific Date and Ranges. This will allow you to create a time frame for a specific range, versus one that will repeat automatically.
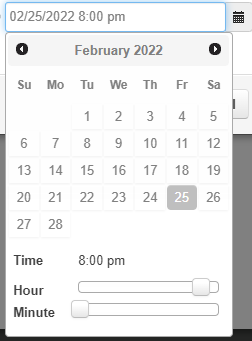
Use the built in Calendar option to choose the date you are wanting to forward calls early, then use the Hour/Minute sliders to specify the time you want the calls to begin forwarding
Make sure to click Save when you are done configuring the time frame
Setting the Call Forwarding
Now that the time frame is created, you will need to add it to your inbound call routing.
First, click on the Inventory tab to find what user the phone number you are trying to forward is routed to
In this example, and most cases, your number will have a destination of Routing User 150. This means the inbound call routing is handled by the answering rules of 150. If you want to change what happens during an inbound call, you will need to modify the answering rules of the user.
Click on the Users tab, and then click on the user set as your phone numbers destination. In this case, it's Routing User 150
After clicking on the user, click on the Answering Rules tab to view the inbound call flow
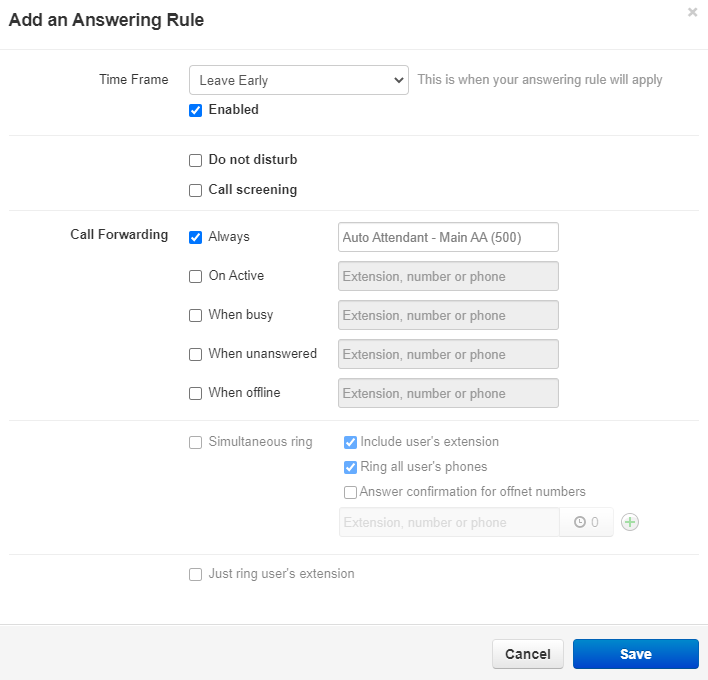
Next, click on Add Rule so you can add a new answering rule to the inbound call flow
Time Frame: Choose the time frame you configured earlier from the drop down list
Call Forwarding - Always: This is where you tell the phone system what you want to happen when this time frame is active. If you are leaving early, you will more than likely enter the destination of your Default/After Hours rule
Once these are set, click Save
Lastly, the answering rules are set in top down priority. In order for you to overwrite your business hours, the custom time frame you added will need to be dragged above your Business Hours. To do this, click on the arrows to the left of the time frame, and drag it to the top. Once your custom time frame is above your Business Hours, click Save to save the changes. The end result should look like the image below
If it is within the time you specified for your Leave Early time frame, then the blue Active badge will be shown next to it
If you have any questions about this process, or if you need assistance, please reach out to our Support Team by dialing HELP(4357) on your desk phone, calling (972) 924-6488, or emailing help@vestednetworks.com.


