O365 / Microsoft / Azure SSO Setup
This page is part of the NOVA SSO guides.
Azure Login
Login to https://portal.azure.com with your developer account
Azure Active Directory / Microsoft Entra ID
Select Azure Active Directory service (now known as Microsoft Entra ID). If it is not visible on the dashboard, you can use the search function to find it.
Select App registrations from the side pane.
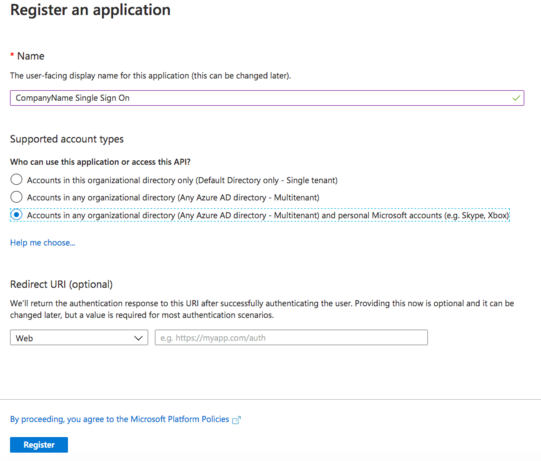
Register a New Application (if not previously performed) by clicking the "+new registration" button/link in the center pane.
Register an application
The window should look similar to the below:
Select the previously created App registration by clicking the Display name.
Copy the newly created 'Application (client) ID' from the data set in the center of the pane and retain for a future step.
Select Authentication from the side pane.
Configure Platform
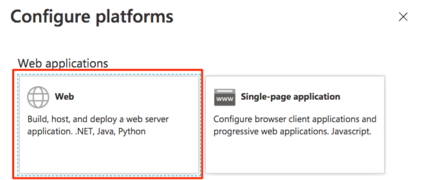
Under Platform Configurations choose "+Add a platform."
In the resulting Configure platform pane, select Web
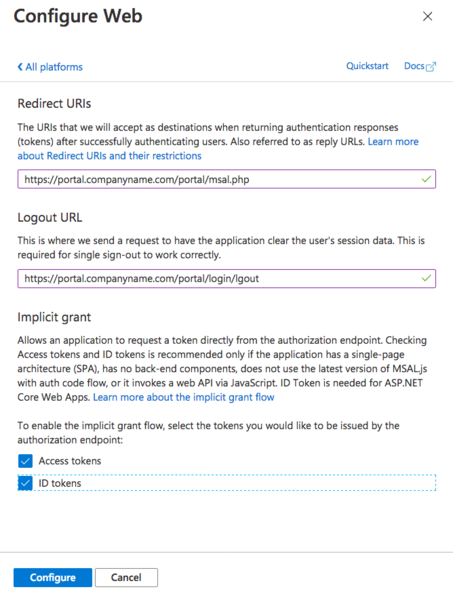
Configure Web
In the resulting Configure Web pane, enter one of the required Redirect URLs, the Logout URL and select Implicit Grant for both Access tokens and ID tokens. When complete click Configure.
Redirect URI:
- https://nova.vestednetworks.com/portal/msal.php
Logout URL:
- https://nova.vestednetworks.com/portal/login/logout
The window should look similar to the below (but I bet you spelled logout correctly):
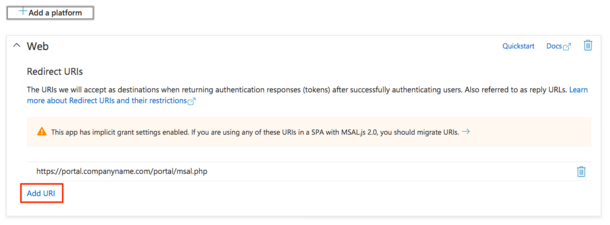
Add Redirects
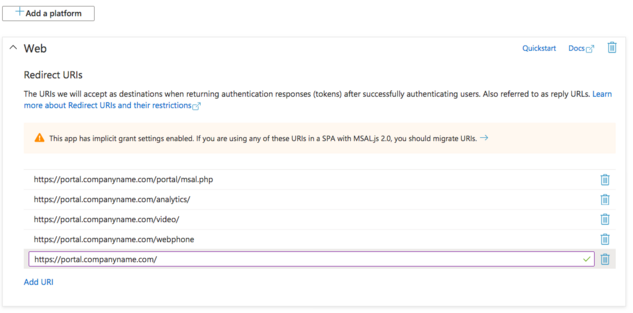
Add the remaining required Redirect URLs by using the Add URI link at the bottom of the Web platform box.
ALL required Redirect URIs are below:
- https://nova.vestednetworks.com/portal/msal.php (Added above)
- https://nova.vestednetworks.com/analytics/
- https://nova.vestednetworks.com/video/
- https://nova.vestednetworks.com/webphone {no trailing slash)
- https://nova.vestednetworks.com/
Review and Save
The Web platform box should look similar to below:
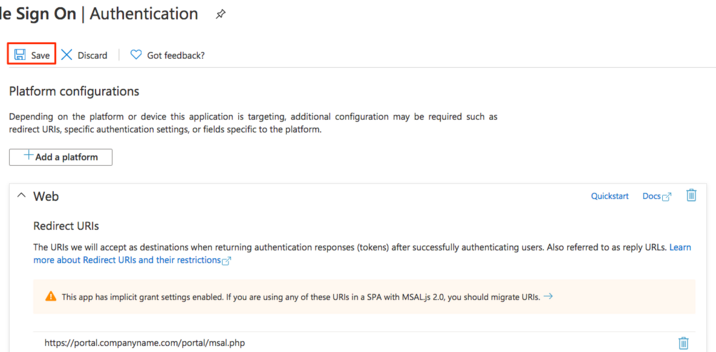
Click "Save" at the top of the page. Your Office 365 SSO service will now be fully configured and enabled on Azure.
NOTE: You should have "personal Microsoft accounts" listed in the "Supported account types" section. If missing, navigate to the Manifest and set the 'signInAudience' parameter to "AzureADandPersonalMicrosoftAccount"
Once this has been enabled, Vested Networks will need to know the 'Application (client) ID' that was retained from above so that we can put it in our system and then we can enable the SSO on our end.
Please contact Vested Networks support if you need any further assistance.
