Fax to Email: Difference between revisions
m (Cbecker moved page Bidirectional Fax to Email to Fax to Email without leaving a redirect) |
No edit summary |
||
| Line 5: | Line 5: | ||
In the Users tab, click the option to '''Add User''' in the top right<blockquote>[[File:Add User.png|frameless|600x600px]]</blockquote>Fill out the new user's information, making sure you set the '''Email''' field to the email address you want to receive inbound faxes<blockquote>[[File:Add User2.png|frameless|722x722px]]</blockquote> | In the Users tab, click the option to '''Add User''' in the top right<blockquote>[[File:Add User.png|frameless|600x600px]]</blockquote>Fill out the new user's information, making sure you set the '''Email''' field to the email address you want to receive inbound faxes<blockquote>[[File:Add User2.png|frameless|722x722px]]</blockquote> | ||
== | == Bidirectional Fax to Email == | ||
Follow the steps below if you are wanting to both send and receive faxes via email | |||
=== Inventory>Phone Numbers === | === Inventory>Phone Numbers === | ||
| Line 37: | Line 37: | ||
=== Back to Inventory>Phone Numbers === | === Back to Inventory>Phone Numbers === | ||
Once the fax number is added, go back to the Phone Numbers list, and you will notice the number has been modified. The destination is now set to '''Fax Server''' and the description of the number has been changed. <blockquote>[[File:FaxNumber3.png|frameless|980x980px]]</blockquote>'''(Optional)''' Click on the '''Pencil''' to edit the number, and change the default description to anything you would like | Once the fax number is added, go back to the Phone Numbers list, and you will notice the number has been modified. The destination is now set to '''Fax Server''' and the description of the number has been changed. <blockquote>[[File:FaxNumber3.png|frameless|980x980px]]</blockquote>'''(Optional)''' Click on the '''Pencil''' to edit the number, and change the default description to anything you would like | ||
== Special Use Cases == | |||
=== Fax to Email Inbound, Physical Fax Machine Outbound === | |||
Note: Vested Networks supports the following ATA devices: | |||
Cisco | |||
-SPA 112 | |||
-SPA 122 | |||
Grandstream | |||
-HT812 | |||
-HT814 | |||
-HT818 | |||
''Ensure you have followed the steps above to configure the fax to email portion.'' | |||
In order to send a fax from a physical machine, all you need to do is register one of the supported ATA's above to the fax user. Ensure the ATA is plugged in to the fax machine correctly. If configured correctly, it will look like the image below:<blockquote>[[File:GrandstreamHT812.png|frameless|1282x1282px]]</blockquote> | |||
=== Physical Fax Machine Inbound, Fax to Email Outbound === | |||
For this setup, you are going to follow the Fax to Email setup, and then make sure the physical ATA is registered to the Fax User. The only difference here is going to be pointing the fax number to the Fax User directly. | |||
==== Inventory>Phone Numbers ==== | |||
Go to the Inventory Tab and find the Fax number in the list. It should be pointed to the destination of '''Fax Server''' if you setup the Fax to Email portion correctly.<blockquote>[[File:FaxNumber3.png|frameless|1088x1088px]]</blockquote> | |||
==== Edit Fax Number ==== | |||
Now click on the fax number to make edits. Change the '''Destination''' to '''User''' and then select your Fax User from the drop down.<blockquote>[[File:FaxUser.png|frameless|600x600px]]</blockquote>'''(Optional)''' You can edit the '''Notes''' section to anything you like. This is just a label for the number and does not effect functionality | |||
== FAQ == | == FAQ == | ||
Revision as of 17:38, 16 January 2024
Creating the Fax User
First, you will need to create a new user in the NOVA portal to be your recipient of inbound faxes.
Add a New User
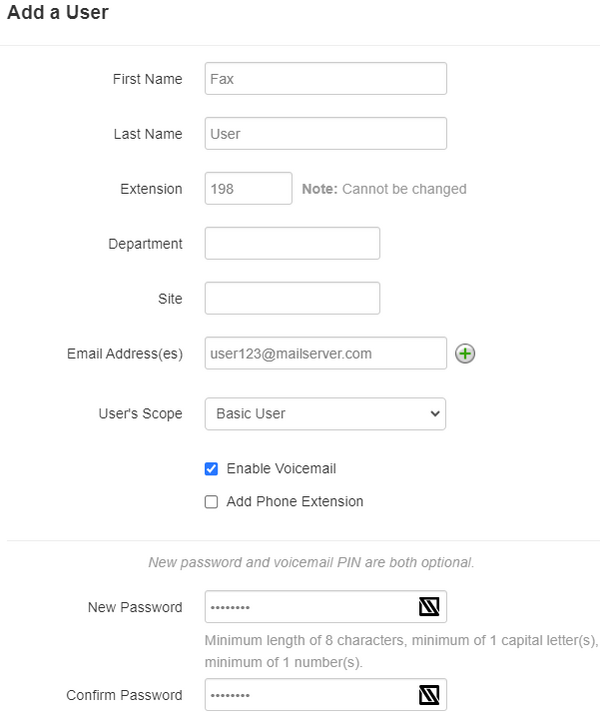
In the Users tab, click the option to Add User in the top right
Fill out the new user's information, making sure you set the Email field to the email address you want to receive inbound faxes
Bidirectional Fax to Email
Follow the steps below if you are wanting to both send and receive faxes via email
Inventory>Phone Numbers
Find the desired fax number in the Inventory tab.
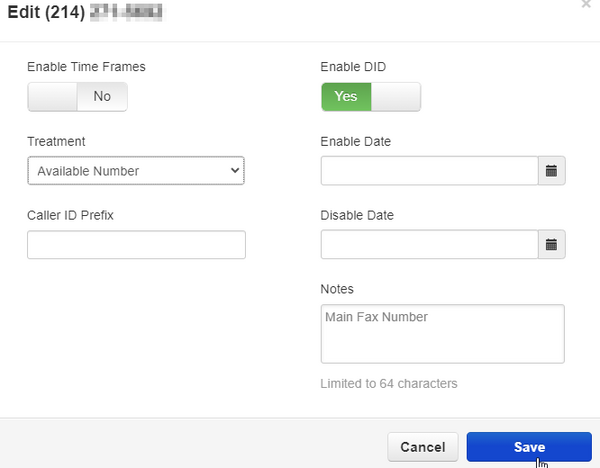
Click on the number to make edits. Change the Destination to "Available Number" and Save
Inventory>Fax Accounts
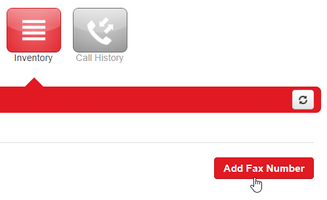
Click on the Fax Accounts tab, and then click Add Fax Number
Phone Number
The drop down will populate all numbers set to "Available" in the inventory list. Choose your desired fax number
Primary User
Enter the extension number or name of the newly created fax user, and select it from the populated drop down menu
Number Sharing
You have an option of sharing the fax number with Everyone, or a specific group of users (Limit 13 users per number). This will allow other users to send outbound faxes using the fax number as the Caller ID
Enabled Methods
Click the checkbox for Email
Inbound Fax Handling
Click the checkbox for Email W/Attachment
Delivery Notifications
This offers the option to receive a notification to the Fax User's email address when an outbound fax was successful
Failure Notifications
This offers the option to receive a notification to the Fax User's email address when an outbound fax fails
Back to Inventory>Phone Numbers
Once the fax number is added, go back to the Phone Numbers list, and you will notice the number has been modified. The destination is now set to Fax Server and the description of the number has been changed.
(Optional) Click on the Pencil to edit the number, and change the default description to anything you would like
Special Use Cases
Fax to Email Inbound, Physical Fax Machine Outbound
Note: Vested Networks supports the following ATA devices:

Cisco
-SPA 112
-SPA 122

Grandstream
-HT812
-HT814
-HT818
Ensure you have followed the steps above to configure the fax to email portion.
In order to send a fax from a physical machine, all you need to do is register one of the supported ATA's above to the fax user. Ensure the ATA is plugged in to the fax machine correctly. If configured correctly, it will look like the image below:
Physical Fax Machine Inbound, Fax to Email Outbound
For this setup, you are going to follow the Fax to Email setup, and then make sure the physical ATA is registered to the Fax User. The only difference here is going to be pointing the fax number to the Fax User directly.
Inventory>Phone Numbers
Go to the Inventory Tab and find the Fax number in the list. It should be pointed to the destination of Fax Server if you setup the Fax to Email portion correctly.
Edit Fax Number
Now click on the fax number to make edits. Change the Destination to User and then select your Fax User from the drop down.
(Optional) You can edit the Notes section to anything you like. This is just a label for the number and does not effect functionality
FAQ
Can one email address receive faxes from more than one fax number?
- Yes. There is no limit to how many fax numbers can be configured for one User
Can the customer configure fax numbers themselves?
- Yes. Since the configuration is done on the NOVA web portal, any customer with Office Manager access can also do this
Can I configure a fax number for an existing user/extension, or do I have to create a new one?
- You can configure a fax number for any user on your domain. If the email address you are wanting to receive faxes to is already configured on a user, a dedicated fax user does not need to be created
Can I receive an inbound fax to multiple email addresses?
- Yes. For more information on how to set this up, click here to view our article on how to modify the inbound fax to email address
Related Articles
How to Change the Inbound Fax to Email Address


